Although this blog is no longer active (Agosia Arts still is!), it remains a useful repository for some of my early musings. My goals were to : 1) provide a peek behind the scenes at how my work is produced; 2) document my problem solving process; and 3) encourage others to try new things. If you have questions, email me at catibbets@agosiaarts.com. Thank you for visiting!

Search This Blog

Showing posts with label beetles. Show all posts

May 26, 2015

Attaching Fabric Beetles to... Whatever

If you are familiar with my work, you know that my large figures feature a beetle companion. The beetles are made of fabric, leather, beads and wire and I've provided step-by-step instruction both on the blog (see these previous posts) and a YouTube video. The beetles are usually low key in color and texture, and I do try to select one that is complementary to the costume or clothing of a figure. Even though the insects are large, most people don't notice them right away. When they do, it's either delight or shock at the discovery. Thankfully, mostly delight.

If you follow my blog posts, you know my philosophy towards glue - basically, don't use it unless necessary. This embellishment, like most others I use, is sewn into place. The most difficult part of the process is deciding where to place the beetle. I audition locations and decide which is best based on color, texture and other embellishments; usually I prefer an asymmetric placement relative to other items on the costume.

The first step is to thread a sturdy needle with button or upholstery thread. Doubled sewing thread is acceptable (run it over beeswax if using), but this requires more stitches and increases the probability of tangles. I take a few anchoring stitches in the clothing of the doll, making sure to only catch the outer layer and not the lining. I don't worry much about being neat because these stitches will not show. 

The beetles have a body that is lightly stuffed and has a bit of dimension.  I can take a large stitch through the underside and body of the beetle without the stitch showing on the front. It is important to have the thread go across the entire width of the body so that it is held securely on the costume. The legs are beaded wires and nearly always catch and tangle the thread. It helps to use a shorter thread than normal and hold the loop with my fingers as I'm pulling it through.

As I pull the thread, I place the beetle right side up against the fabric.  If I've folded the legs up, I have to put them back into place while the thread is pulled taut.  There isn't any reason to make more stitches and loops to secure the beetle because it is lightweight and hugs the surface.  I carefully take one anchoring stitch just under the side of the beetle, make a tiny knot, clip the thread and I'm done. Pretty easy!

It doesn't seem like that single stitch would be enough, but I've taken a few dolls apart and had to struggle to undo that stitch. It is quite secure!

Stay tuned for more tips and techniques...

February 17, 2015

Technique Tuesday: Stumpwork Beetles!

One of the design elements on each of my cloth figures is it's beetle companion.  Those beetles are created using a variation of stumpwork, a 3-D embroidery technique.  I wish I had the time to make each insect by hand, but I don't, so I've altered the methods to add a machine stitched shortcut.  I get a lot of questions about the beetles and always try to explain the process as best I can.  In previous posts (Part 1 and Part 2), I outlined my methods, but this month, I made a video.

If you would like more information about stumpwork, there are quite a few good books out there.  The technique is hundreds of years old, but is going through a well-deserved revival in popularity.  My two favorite books are by the same author, Jane Nichols.  Stumpwork Dragonflies is lovely, but The Stumpwork, Goldwork and Surface Embroidery Beetle Collection is a stunner.  I think it deserves a spot in every embroiderer's library.  If you don't want to purchase the books, they are available through interlibrary loan - visit your local library for more info.

January 12, 2013

Introducing Pinacate

Pinacate, ready for work!
Nearly a year ago, I started working on a large beetle figure and posted progress up till that  point.  As proof of how horrible I can be with self-imposed deadlines, I haven't written anything about her since.  Well, introductions are in order.  Meet Pinacate, or to non Spanish speaking people, Stinkbug.  I prefer Pinacate.  She is modeled after Eleodes species, which are common throughout New Mexico.  Now that she is complete, she will be joining a roadrunner figure (Paisano) in a new, ongoing art project on my new blog.

Even though I've been lax posting progress of her construction, it has been a lengthy learning experience.  I will likely make more invertebrates in the future, but I'm not sure I will use the same methods.  One part of her anatomy which is visually pleasing to me (although it won't show very often) is her ventral surface.  Her legs are attached with buttons and look similar to the real appendages you see on a real beetle.  The downside is that the legs don't move quite the way I want them to.

The head, front view.
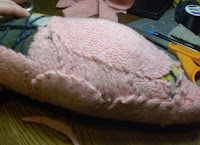
The entire beetle was made with felt, then covered with thin, black leather.  This aspect of the work turned out quite well.  All of the seams were hand-stitched with blue thread because I wanted it to be clear that this was a constructed figure, not a replica of a beetle.  I think it is important the the hand of the artist should be visible to the viewer and is was expressed with thread on this figure.

Stitching the leather.
The downside of working with leather is that it is a killer on the fingers.  Not only does it require more finger strength, but you must have the right tools.  I use a leather needle (super sharp and unique shaped tip) and strangely enough, my quilting thimbles.  More of this in the future.

So, Pinacate is done and ready to get to work.  I have a series of posts coming up on designing doll clothes, then I'll get to a post on creating my photography works - starring Pinacate.  Stay tuned.

February 10, 2012

That's one big beetle!

I've been working on my large beetle and have some photos to share.  A previous post described the beetle and some of the technical issues that needed to be addressed.  Here, you'll see a bit of the progress I've made.  Some real beetles from NM are acting as my models (thanks guys!) and I've spent a lot of time measuring and photographing them. 

The basic body of the sculpture is made of felted sweaters, my favorite medium.  The core is roughly shaped with some yarn wrapping, then final shaping is done with extra layers of felt.  The body will then be covered with black wool and, finally, black leather.


The key to this sculpture is the legs.  I'm using a stiff wire core, bent into a rough narrow hairpin shape.  The open, rounded ends allow screws to attach two leg segments together to form a joint.  Each segment is covered with yarn, so that I can attach wool padding.

When you take a close look at these beetles, you notice that the leg segments are not round, nor flat, as most people might think.  Each segment has a particular 3-D shape and is replicated by wrapping and stitching wool to the yarn.  Each segment is then covered with black leather, stitched in place by hand.  I've taken a bit of artistic license and stitched with blue thread instead of black.


Each segment is attached to another with small screws, washers, and stopnuts.  The assembly will allow the joints to move freely, but still have some stiffness to hold a pose.


A future post will show the completion of the exterior and close-ups of the head.  It's been fun working on this beetle, but I have to admit, playing with real thing is even more fun.  Perhaps I'll post some videos of my guests at work.

December 17, 2011

An inordinate fondness for beetles...

My next big sculpture will be a beetle.  The idea is to have something pose-able, that I can photograph.  I want the insect to be as realistic as possible, so I have to keep in mind what the beetle does (flies, walks) and how she does it.  It would be relatively simple to make a cloth figure that is accurate on the exterior, but of course, making something accurate and movable adds extra work and complexity.

Basic beetle from the top
The first problem might be the wings, but I lucked out in this case because the beetle I’m going to interpret is the Pinacate – or New Mexico Stinkbug (not a true bug!).  I was pretty pleased when I learned that this type of beetle has fused elytra (wing coverings), and do not fly.  One big issue with which I will not have to work  
is the wings.  Although we don’t think (and usually can’t picture) beetles flying around, most do, and do so quite well.  Their wings are covered by the elytra, the hard exterior we see all the time, which hinge up and pivot out of the way to allow the wings to extend. 

The major engineering concern is the legs.  Most of the time, we can barely see the feet of beetles (if at all), but most have long and many jointed legs.  There are joints that allow the legs to pivot at the join of the abdomen, and then ‘knees’, a set of ‘ankles’ and multi-jointed feet.  The multiplicity of joints allows for a huge range of movement.  All the major joints need to be in a figure to allow for the same range of movement in the final sculpture and the visible extras should be there for accuracy.

Basic beetle from the bottom
The Pinacate are beetles ubiquitous throughout the southwest.  They have a quirky, mechanical gait that looks oddly robotic and not at all beetle-like.  They trundle about fearlessly, and at some times of the year, they are truly everywhere you look.  When disturbed, the beetles stick their butts into the air and emit an odorous puff of chemicals.  I am one of those lucky individuals who can’t smell the odor, and I spent a lot of time as a kid playing with these guys.  Supposedly, they also taste nasty (haven’t tried it!), so birds and lizards don’t bother them much. 

One of the interesting aspects of the Pinacate (besides the headstands) is that the legs and joints are almost entirely visible.  The ‘knees’ seem to stick up and out from the body  (oval-shaped and black, black, black).  So, these legs will be visible in the final sculpture.  I’ve decided to use wire and Button joints for the legs.  Unlike my usual animal figures, beetles don’t have a face that people relate to, so most of the personality will have be portrayed with body language.  That’s not to say, she won’t have a face, it just won’t be a pretty one!

Stay tuned for construction updates in the next post.  

February 3, 2011

Beetles, Part 2


The last post described the first steps to creating my beetles.  The remaining steps are outlined below.  The sessions in the studio resulted in 60 beetles; they will be enough for about a year.


Wire and bugle beads make good legs.

I use 24 gauge floral wire (i.e.plastic covered wire) and bugle beads for all the legs.  I could certainly use seed beads, but it would take much longer to string them onto the wire and the resulting legs wouldn't look quite right.  Another option is to cover the wire with floss, but again, a huge time factor is involved.  Beads are strung on (ends crimped) with  two seed beads in the center and set aside.

Love those beady eyes!

The eyes are also beads (large seed beads) and are sewn on with upholstery thread.  I used to glue, but now I have a multi-step sewing process for eyes and legs that is quick and easy and I don't have to wait for the glue to set.  Nice.

Preparing to sew on the legs.

After sewing the eyes and wrapping the thread to make a head, a locking stitch is taken below the folded fabric. 

Legs in position.

Each pair of legs (on one wire) is sewn with a locking stitch taken between the seed beads.  When using bugle beads (which have sharp edges of cut glass), it is very important to have seed beads next to your thread; this prevents cutting from the edges of the bead.

Bending to create joints

The legs are bent into realistic positions.  The nice aspect of this technique is that the legs look jointed as a real beetles legs do.

Gluing the pronotum onto the elytra.

I use scraps of leather to simulate the pronotum, the hard covering of the thorax of a beetle.  Leather in complimentary colors is cut into oval shapes and PVA glue is used to attach it to the back of the insect.  Sewing the leather is a possibility, but it would take a long time and require very strong fingers.  Glue also leaves a very clean finish. 
Almost done!


A handfull of beetles, ready for a new home.


December 28, 2010

Beetles, Part 1

The starting point: lovely fabrics and rayon threads.
I've hit a wall working on my large figures, so I've decided to spend some time making beetles.  If you are familiar with my work, you know that each figure has a beetle companion.  I'm running low on beetle inventory, so it's time to make a new collection.  Usually, I only do this once a year, so I don't have to go through the tedium of making a few every time I make a batch of figures.

Each beetle requires two short lengths of fine wire.

The process I use is derived from one described in The Stumpwork, Goldwork and Surface Embroidery Beetle Collection by Jane Nichols (see my Reference Books page for more info).  The technique is based on stumpwork, a form of three dimensional embroidery.   The beetles are made from wire, fabric, thread, stuffing and beads. Wire is necessary to give the insect structure and to form a pleasing 3-D shape.  The first step is to cut small lengths of wire; I use plastic coated 24 gauge wire to prevent rust and discoloration. 

Bending wires; my cat Gozur is providing advice.

Each wire is bent once to give a 90 degree angle (shown in the pile above left), then again around a pen to give a rounded edge.  The process creates a hairpin shape with one sharp corner and one rounded edge (shown in the pile above right, next to the cat feet). The wire is very flexible, so there's quite a bit of play here to change the contour of each beetle.  It's easy to make long skinny, or short rounded, or any other combo of shapes.  Once the wire is sewn however, the outline of the beetle can't be changed.

Each pair of wires is sewn onto fabric and backing

A pair of wires is placed on top of the beetle fabric (I usually use upholstery brocades) and black backing fabric.  A short zig-zag is used to stitch down the center and along each side wire using rayon embroidery threads.  It is important to cover as much of the wire as possible.

A set of beetle elytra ready for the next step.

After all the wires have been stitched down, each beetle back (a pair of elytra) is carefully cut out.  By sewing the brocade and backing fabrics together in this way, two channels are formed which give the final insect some dimension.

Stuffing the elytra to give dimension
The back of the elytra pair


The channels are stuffed with a small amount of polyester fiberfill, giving the elytra a realistic appearance and some 'heft' to the body of the insect. Because of the next step, it is important to use a small amount of fiberfill and to get it to the bottom of the channels. 

Folding wires to cover raw edges.
More folding to form head/thorax


After stuffing, the wires and fabrics are trimmed and the sharp ends folded to the back.  The side wires are given another 90 degree fold to cover the raw edges and form the basis for the head and thorax.

Stay tuned for the final steps!