I am much more a crocheter than a knitter. I am always saddened by the wacky and weird things that people crochet, even today. I sometimes think we haven't quite gotten over the horrors of 70s crochet. I suspect one of the issues is that many people want instant gratification. The result is a preponderance of chunky yarns giving rise to bulky sweaters and unwearable socks. But have you noticed we rarely say these items are lovely, elegant, or beautiful?
Back in the hey-day of the needle arts, women made some stunning things. Most of these were created with very fine yarns (and threads) and tiny hooks and needles. These laces, stockings, and baby garments are universally appealing, even today. Sadly, few people devote time to try to master the skills. It's not difficult - it just takes time.
I have a deep seated love of crochet lace and I do make some now and again. Usually it is for a figure, and because they are small in scale, I must use threads and tiny hooks. The results are always amazing. It is worth every minute and finger cramp.
I have an extensive library of vintage patterns and books, but my heart always goes pitter patter when I find something new. 
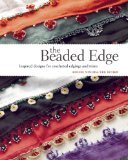
The Beaded Edge: Inspired Designs For Crocheted Edgings and Trims by Midori Nishida covers a topic new to me: Turkish oya. These are simple edgings created primarily with chain stitches and beads pre-strung on the thread. The result is a lacy, but sturdy, beaded edging that is then stitched onto the fabric. The projects are simple, but give examples of how the edgings could be used for just about anything. The front half of the book provides clear, large photos of the edgings in process. The second half provides universal diagrams to clearly show all the steps for each edging. If you are familiar with Japanese crochet books, you know how well these diagrams can be done; this book is an excellent example. In the middle is a brief discussion about how the author discovered oya, their history and use. The format is a bit odd, as the text is rather dense and jam-packed into three pages. It seemed almost an afterthought to toss it in and doesn't match the rest of the book stylistically.
No matter, this is a great book. I have only one negative comment, and it is minor. There is a photo on page 55 showing vintage oya, and most of the designs are not provided. Dang! There is a second book, however, so I have hope I can find some of the patterns there. I recommend this book to all crocheters - nearly everyone will find something useful and the techniques are easy enough for beginners.
Although this blog is no longer active (Agosia Arts still is!), it remains a useful repository for some of my early musings. My goals were to : 1) provide a peek behind the scenes at how my work is produced; 2) document my problem solving process; and 3) encourage others to try new things. If you have questions, email me at catibbets@agosiaarts.com. Thank you for visiting!
Pages
Search This Blog
April 10, 2013
March 21, 2013
Book Review: Underwear: Fashion in Detail

lace-up stays |
handmade lace |
3) A leather 'Dermathistic' Corset (1883, used for exercise (and you thought your running bra was intense!). Made from whalebone with leather facings and brass eyelet closures. (bust 73 cm, waist 56 cm, hip 80 cm) Quote for the day: "Women took up a variety of sports, including croquet, hockey, golf and tennis, in addition to their more traditional outdoor activities in full day dress, including their corsets, and the common sight of bloodied corsets in tennis club dressing rooms testified to the pains of the active woman". Yikes.
March 5, 2013
Old Crochet Lives Again
I recently began a commission and I decided to use an old crocheted doily in this piece for added texture and visual interest. I dyed the doily a dark green and discovered that, gasp!, the motifs were joined with nylon or polyester thread. I find it comforting that the artisan who created this piece broke a rule or two when finishing her work. (One is always supposed to use the same fiber to connect pieces of crochet or knitting. There is lively debate among some sewists whether it is appropriate to use silk thread with cotton fabrics because silk is stronger and may eventually cut through the cloth.)
I wasn't concerned about the white thread because I eventually needed to deconstruct the crochet to finish the piece. Step one was basting the crochet to the green wool backing. Pins never work for me, so hand basting was done with a long milliners needle and bright yellow thread - shown at left. Step two created the body parts: right sides together (wool plus crochet treated as one fabric), sew, turn, stuff. The fabric was used to make arms, upper legs and the body.
Step three took a bit of time. Each bit of stitching holding the crochet motifs had to be carefully snipped, then the doily restretched and repinned. Every single picot stitch was firmly tacked to the wool backing by hand and an olive green glass bead sewn into the center. The glass beads are not immediately obvious, but they give another layer of texture and touch of delicacy to the work. In this case, they body will be left as the main costume (like a body suit) and the layers of color give a rich finish.
Stay tuned for more on this piece...
February 1, 2013
Book Reviews: Savage Beauty: Alexander McQueen

I've been writing about doll clothes recently, so I thought I would take a break and write a bit about some real clothes and a few of my favorite fashion coffee table books. Being a librarian, I always try to request a book through the library before I buy it. With the hefty art and design books, this is a useful strategy because those books can be pricey (and sometimes awful!). As soon as I could after it was published in 2011, I requested Alexander McQueen: Savage Beauty. When the book arrived, and I casually flipped through it, I was blown away. I was familiar with McQueen's designs and had long been a fan, but seeing the the clothing well photographed up close was thrilling. I lovingly perused each page 50-60 times. When I had to return the book, I mourned. My husband earned his spot in heaven by purchasing the book as a surprise gift.
What makes this book so special? The clothes are amazing and it isn't often one gets the opportunity to see so many of a designer's work in one viewing. McQueen's vision went far beyond covering the body with fabric in clever ways - this body of work is art at the highest level and it is stunningly obvious on these pages. The photography is extremely well executed and shows each article of clothing to its best effect. You may be familiar with McQueen's runway shows, but without all the hoohaw in the background, the beauty of these perfectly constructed clothes shines through. Find a way to see this book; your life will be enriched.
Coming soon, a review of my favorite Dior book...
January 21, 2013
A Doll Clothier's Bibliography
![]() |
Visit Etsy to see more dresses. |
Here's some advice:
1) Pay attention to scale. This is the golden rule in doll making. The smaller the doll, the thinner the fabrics
and the tinier the embellishments must be.
If you're creating Barbie costumes for a friend, there's some leeway
(especially if she's 6), but if you are serious about the clothes looking
'right', you must use the appropriate weight of fabrics. And you know what? Kids can see the difference, too. They like to play with beautiful clothes as
much as you do. Do your best to make
something that looks like a real person would wear it.
![]() |
3) Be aware
of turn of the cloth. If you are new to
sewing, this phrase refers to the incremental but progressive addition of bulk
and reduction of length of a garment due to multiple layers of cloth in a seam. Turn of the cloth can be crucial in the success of
a small garment. Sometimes, no amount of
pounding, trimming or stitching is going to get rid of that bulk. Use the finest, thinnest cloth you can find.
4) Keep it as simple as possible. Unless you want to be frustrated and angry, when
working with figures smaller than 20", don't fiddle with zippers,
buttonholes, facings, multiple pockets, or other complex components. Find a way to suggest these elements are present.
You will drive yourself insane trying to insert a bound pocket into a
tiny jacket. Sewing a pocket flap on a
Barbie coat could be dangerous to your mental state. Beware!
6) Sewing
by hand can be faster and easier. Sounds crazy, I know. When your total seam length is three inches,
pulling out a needle and thread is the way to go. Clothes children will use should be sewn by machine for extra
strength. On my own figures, more than
half the sewing is done by hand. It
would be more difficult and take longer to use a machine.
5) Don't
glue. Please don't glue. Ok, if your creation is going to be a static
sculpture that will be displayed under glass, glue away. Otherwise, no glue! Beads, lace, buttons, do-dads of any kind
should be sewn on. If kids are going to
be playing with your designs sew everything on - twice! Glues fail, often at the weirdest times. And when you are working small, it takes a
special skill to apply glue invisibly.
Trust me, it's difficult and many mistakes are made.
Last by not
least...
7) Whenever
possible, create your own patterns.
Why? A few reasons. Even if you find something on-line or in a
book that seems perfect, that pattern was designed by a person who had a
particular skill level, sewing machine, and materials that are not the same as yours. I'm not putting you down in any
way. The fact is, if you sit 10 people
down to sew something, you're going to get 10 different results. Although you probably don't believe me, it is
less stressful to make your own designs, taking into account your sewing idiosyncrasies. Second, if you are working with your own
figures, no pattern you find is going to work.
Struggle through it yourself; it may take a few tries, but you'll get
there. Third, although there may be
patterns out there, they are not for you to use willy nilly. And you can bet the designers didn't intend
for you to make money with their designs.
If you're selling anything,
obtaining permissions and arranging payment is a rugged process. Don't think for a minute you can get away
with ignoring that step either; someone will find out and negativity of one
form or another will blow your way. Just make your own patterns, it isn't that
hard.
Where to
turn for advice? Books! I'll be augmenting my Reference Shelf Page with some of my favorites that cover clothing/costuming
topics. They are listed below in order of
importance/usefulness.
Let's start with the best. If you are
interested in making clothes for dolls - any kind of doll - there is only one
all-around reference and that's Finishing the Figure by Susanna Oroyan.
Her other two books (Anatomy of a Doll and Designing the Doll) are the
go-to books for doll makers of all kinds. Ms. Oroyan is a master of
her craft and has presented just about every topic of clothing design
and construction one can imagine. Obviously, the emphasis is creating a unique figure, and then
designing outer wear, but most of the topics covered can relate to sewing
costumes for commercially available dolls.
If you can afford only one book on costumes, this is the one to
buy. Everything from undies to shoes is
discussed, as well as glasses, fairy wings, and a variety of odd topics. An
excellent reference.
I've reviewed Pattern Magic I and II by Tomoko Nakamichi in a previous post. These two books are targeted toward sewists who are serious about technique and creating unique designs. That said, there is nothing difficult in the books. The benefit to doll clothing designers is the clear explanation of technique, a plethora of drawings, emphasis on experimentation, rigorous testing with a muslin, and insistence on good fit. We could all benefit from heeding these lessons no matter the size range of our work.
The Art of Machine
Piecing by Sally Collins is a quilting book. As you may know, I am a dedicated quilter and
have an extensive collection of books on the topic. Why include a quilting book here? The reason is simple. This book is a compilation of all the things
Ms. Collins has learned while focusing on her great love, sewing miniature
quilt blocks. When I say miniature, I mean
really, really tiny. Because she is
working on such a small scale (Barbie enthusiasts, take note!), precision is űber
important. The discussion on testing
your machine for seam accuracy can be a real eye-opener. Read the book for this reason alone.
When Hankie Couture by Marsha Greenberg hit the stores a while back, it was
a sensation. At least for me
anyway. The author turned her passions
for doll clothes and vintage handkerchiefs into a charming business; her style
shines through in all her creations. Picture the kind of hankies your aunt or
grandmother used to pull out of her purse: embroidered hems, a bit of lace,
maybe some funky prints - these are ones the author is using. The clothes are creative, using the design of
each handkerchief to best advantage. The
author provides patterns for a few basic
dresses, but the vast majority of the book is simply photos of her 'girls'
wearing fabulous outfits. One thing to
point out here is that the author is using a perfect material for small format dresses. Handkerchiefs are lightweight, but usually
with a tight weave and pre-hemmed edges.
Think about that when you pull out your vintage velvet stash to make a
mini-ballgown.
Cloth Doll
Artistry: Design and Costuming
Techniques for Flat and Fully Sculpted Figuresby Barbara Willis was
one of the myriad doll books that came out a few years back - during the 'express
yourself with dolls' phase. As with all
those books, most of the topics are rehashed, but there are some helpful
tidbits. What's unique here? This author discusses flat dolls - think of
them as highly embellished paper dolls- and uses them as mini-design
boards. This could be a useful feature
for some budding clothing designers, trying out color combos and fabric choices
before committing to needle and thread.
Bridal Couture: FineSewing Techniques for Wedding Gowns and Evening Wearby Susan Khalje is
an under-appreciated reference. It's
clear what the focus is here, but the discussions of fabrics, linings and
embellishments (especially lace) are spot-on and useful for all small-scale
clothing designers. Ms. Khalje is a regular contributor to Threads magazine
(one of my favs) and her examples are well photographed and explained.
Creative Cloth Doll Making by Patti Medaris Culea was published in the previously
mentioned doll phase, but this book had more weight due to
the professional reputation of the author.
Ms. Culea provides some patterns for a doll, discusses embellishment
options and shows a gallery of dolls (all using the same pattern) by a
multiplicity of dollmakers.
The benefit is seeing what others do with a design: some make clothes, some add directly to the body, some mix it up.
Everywhere I travel, I visit used bookstores. On a visit to Indiana, I discovered Soft Sculpture by Carolyn Vosburg Hall. I mention this book to highlight an important point - don't discount something because it's 'too old.' This book was published in 1981 and has gazillions of photos of what I classify as horrible 70's textile art. Imagine what the 70's did to crochet and weaving and you get the picture. Flipping through this book you might be discouraged, but actually it's a gem. Twenty years before Susanna Oroyan's wonderbooks, this one covered all the basics of textile based sculptures; I still use it as a minor reference now and again. Topics include 2-d design to 3-d sculpture, creating realistic body parts, pattern design, sewing/construction guidelines, armatures, fabric choices and more. I don't expect anyone to search out this book, or even be able to find it in a library. Just remember one thing, every book has a lesson for you - maybe small - be open to it.
January 12, 2013
Introducing Pinacate
![]() |
Pinacate, ready for work! |
Even though I've been lax posting progress of her construction, it has been a lengthy learning experience. I will likely make more invertebrates in the future, but I'm not sure I will use the same methods. One part of her anatomy which is visually pleasing to me (although it won't show very often) is her ventral surface. Her legs are attached with buttons and look similar to the real appendages you see on a real beetle. The downside is that the legs don't move quite the way I want them to.
![]() |
The head, front view. |
![]() |
Stitching the leather. |
So, Pinacate is done and ready to get to work. I have a series of posts coming up on designing doll clothes, then I'll get to a post on creating my photography works - starring Pinacate. Stay tuned.
Subscribe to:
Posts (Atom)